After making my first windchime, I made a second, and a third and then a fourth, and while it is nice to know when the wind is blowing, I really wanted a wind chime that I could control (preferably with a computer).
Fortunately for me, I had some tools and materials.
Figure out the tube lengths
 I started out with about 3 meters of 1¾ inch conduit.
Whoa, am I mixing metric and imperial? No way Bub! I did all of the measurements in metric. That 1¾" pipe is actually 44mm in diameter.
Anyway, I fired up tubell, selected a full octave of notes and entered the total pipe length.
Cut to length
 Once I had the measurements, it was time to start cutting.
In hind sight, I probably shouldn't have used a haggard old sawsall for cutting the tubing. Although the sawsall is far preferable to using a hacksaw, a metal cutting blade on a circular saw would have made a much cleaner cut.
After this pic was taken, the holes for suspending the tubes were drilled.
Cut some pegs
 my "design" for this Tubular Music Thingy involved making a frame to hold 8 tubes strung together and some pegs would be used to keeps the tubes separate.
I don't remember the length, but these pegs have a 9mm diameter.
Drill some holes to hold the pegs
 Technically, I used a 9mm drill to make these holes, although the bit was actually measured in some horrid fraction.
In other news, I should really put "shop-vac" on my shopping list; because there is no way in hell that I'm going to stop building stuff indoors when it is raining out.
Put the frame together
 All lined up and screwed together.
See those notches on the short sides of the frame? That is where the end of the string holding the tubes will go.
Legs!
 After adding some legs to the tube holding frame, the tubes were threaded and put in place.
And thus completes step 1 of the Tubular Music Things. To be honest, I mostly build this thing so I could play Sudo Modprobe.
Now quit reading, and SWITCH TO THE METRIC SYSTEM!
Quite often I find myself over at http://thesession.org checking out old traditional tunes. The site offers the tunes as sheet music and ABC Notation. While I certainly appreciate having ready access to the tunes, I find that, more often than not, I need to copy the ABC notation into a text file, convert the text file into a [lilypond[(http://lilypond.org) file, transpose the lilypond file to the G Major scale, and then finally add some code that will display the tune as banjo tabs. Oh man, did you catch all of that? There has to be an easier way to do this.....
Oh, there is...
For the most part, the process is just a series of text manipulations which can be accomplished in just about any programming language. Since I am currently on a Ruby kick, I figured I would just hammer out a quick script to automate the process of retrieving ABC notation from a given page and converting the results into something more usable.
Enter the Ruby
require 'optparse'
require 'open-uri'
require 'rexml/document'
require 'iconv'
def sanitize( string )
#replace non alpha-numerics with _
string = string.gsub(/[^A-z0-9_]/,'_')
return string.downcase
end
def error( string )
puts "**** ERROR ****"
puts string
exit
end
option = {}
OptionParser.new do |opts|
opts.banner = "Usage: sessionconvert [options] [thesession.org_URL]"
opts.on("-b", "--banjo", "add banjo tabulature") do |v|
option[:banjo] = v
end
opts.on("-l", "--lilypond", "compile with lilypond") do |v|
option[:lilypond] = v
end
end.parse!
url = ARGV[0]
# was a url supplied?
unless url
error "you must supply a thesession.org url"
end
begin
text = open(url).read
rescue
error "Failed to read #{url}"
end
begin
#watch out for sneaky
ic = Iconv.new('UTF-8//IGNORE', 'UTF-8')
valid_string = ic.iconv(text)
doc = REXML::Document.new valid_string
rescue
error "Failed to parse #{url}"
end
root = doc.root
p = root.elements["body/div[@id='abc']/div[@class='box']/p"].to_s
abc = p.gsub(/<.*>/,'')
#get the title
m = /T: (?<title>.*)/.match( abc )
title = m['title']
#get the key
m = /K: (?<key>.*)/.match( abc )
key = m['key']
#sanitize the title, we will use this a bunch
sanitized_title = sanitize(title)
#what will the filenames be?
filename_abc = sanitized_title+".abc"
f = open(filename_abc,'w')
f.write(abc)
f.close
begin
`abc2ly #{filename_abc}`
rescue
error "abc2ly is not installed"
end
#what will the lilypond file be?
filename_ly = sanitized_title+".ly"
if option[:banjo]
#what is the key we are transposing from
t_key = key[0].downcase
banjer_bit = "\\transpose #{t_key} g,
\\context TabStaff = \"banjer\"{
\\set TabStaff.stringTunings = #banjo-open-g-tuning
\\set Staff.instrumentName = #\"Banjo\"
\\context TabVoice = \"banjer\" { \\tabFullNotation \\stemDown \\voicedefault }
}"
text = File::read(filename_ly)
#substitute the banjer stuff
text = text.gsub(/<<.*>>/m, "<<\n #{banjer_bit}\n\t>>")
#make a new lilypond file
filename_ly = sanitized_title+"-banjo.ly"
#write the new text to file
f = open(filename_ly,'w')
f.write(text)
f.close
end
#did the user request compiling
begin
`lilypond #{filename_ly}` if option[:lilypond]
rescue
error "lilypond is not installed"
end
If you have problems copying the code, please see http://hoof.jezra.net/snip/nQ
Usage
Since I don't always want to convert a tune to banjo tabs (some tunes are better on the concertina), a flag (-b) needs to be included with the arguments to specify that the tune should be converted to banjo tabs. Similarly, including the -l flag with compile the final lilypond file into a pdf of sheet music or tabs.
For example: The tune Rakes of Mallow is found at http://www.thesession.org/tunes/display/85 and to convert the tune to banjo tabs and compile to a PDF the following command would be used.
This is what the final PDF looks like. Damn that's nice!

...and this is me butchering the tune on my banjo. Damn, I need more practice.
Awesome! Now quit reading, and go butcher a tune on the instrument of your choice.
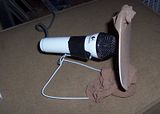 Today, when I got home from work, I went to my recording studio (AKA my living room with a $12 microphone) and recorded a clawhammer rendition of Sudo Modprobe: the Linux Outlaws theme.
For a while now I've been plinking the melody on the banjo and I really wanted to add in some banjo distinctness to the tune. Although the tune should probably be slower, it is hard to not speed it up when playing on the banjo.
Now quit reading, and give a listen to Sudo Modprobe on the banjo
And don't forget Sudo Modprobe on the great highland bagpipes
haha!
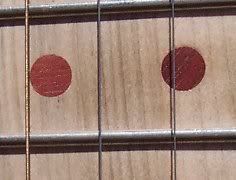 My friend with the wood shop has made a few stringed instruments before and he let me use some spare fret wire. Here is the 12th fret with fret markers. the markers are made from the same piece of bloodwood that I used to make the bridge,tuning pins, string saddle thing, and the pot rod. Speaking of blood, there are a few drops on the 7th fret from when I had to say "oops, that's finger", while hammering in the fret wire.
A forchner bit drilled the hole in the neck and a plug bit cut plugs of blood wood that I gently tapped into place. Well, it might not have been that gentle and two of the pegs broke just below the level of the neck. Hey! it adds personality.
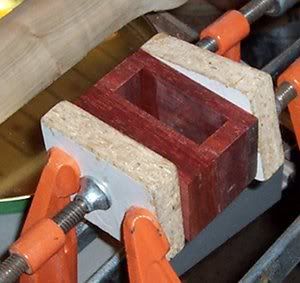 This is the string saddle thing in a vice. After the glue dried, I sanded and smoothed the thing, drilled some pilot holes and attached some brass screws to attach the strings to. The whole thing slips on over the pot rod, so if I ever find a nicer tin or my tin needs to be replaced, I can slide the saddle thing off with little hassle.
 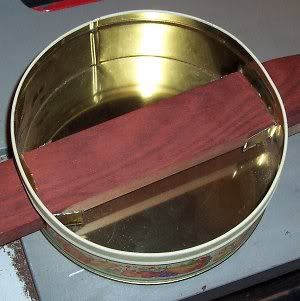 The tin was cut with a dremel tool and the flanges from the cut were folded into the tin to run parallel to the pot rod.
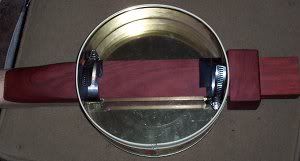 Two hose clamps and a bit of old bicycle innertube keep the tin in place on the potrod. These aren't really needed because string tension on the saddle thing keeps everything quite snug.
  Hey it's the bloodwood bridge!
 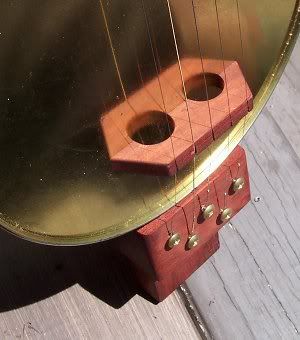 There is something about the reflection of the bridge on the tin that I find quite mesmerizing. Don't forget to look at the string holder thingy with the brass screws.
  And finally.....the finished product.
For reason's that most people probably wouldn't understand, she has been affectionately named Shemp in honor of Shemp Howard: my favorite of the six Three Stooges.
After sitting down and taking the time to properly tune Shemp, she sounds quite nice and hopefully, in a few weeks, I'll have gained enough skill on the banjer to make a recording to share (it will be 'Banks and Braes'; I love that tune ).
For the next banjo, should I decide to make another, I'll use a dark wood for the fretboard as it is currently hard to see the strings against the light wood; especially with the grain going with the strings. I would also like to make a wooden pot, although I don't think I'll make a proper banjo head. Hmmm, my buddy does have a lathe.......
I'd like to thank my buddy for the use of his shop, Pat and Patrick Costello for inspiring and teaching me through their blog posts, books, and videos. Frail on!
Well that's all for now, time to get back to banjo practice!
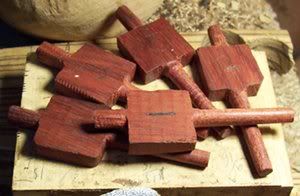 The first thing that needed to be done was the creation of the last tuning peg. Since all of the pegs are quite unique in shape, I decided to etch numbers in the peg face so that it would be easier to keep track of which peg should go where when I taper the tuning pegs holes in the neck.
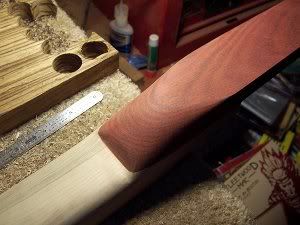 Where the potrod was glued to the neck, I rasped and sanded to get the shape just the way I wanted it. After the neck and potrod was shaped, I sanded with various grits to get the neck as smooth as possible.
  The tails were trimmed off of the tuning pegs and the corners where rounded with a rough grit sand paper. At this point, I simply had to see what the finished banjer would look like with my new cookie tin banjo pot. Since the potrod is quite a bit longer than the diameter of the tin, in the future I will probably make a wooden banjo pot with a drum head. It could be a neverending project.
Next up (in theory): fret dot inlays, cutting the pot to fit the potrod, crafting the nut and bridge, figuring out the tailpiece/saddle.
There is a certain level of "how the crap am I going to do that?" when I get to each step of making pieces of the banjer. Sometimes, the problem is solved with a bit of woodshop instruction from my buddy and the use of a jig that he has made. Other times, well, there is probably a tool to do what I need, but it isn't in the woodshop.
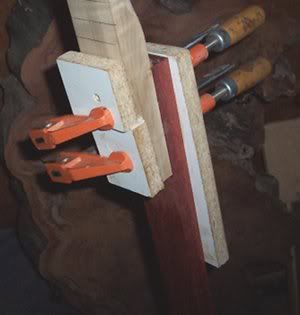 A 2" by 12" by 1" piece of bloodwood was glued to the base of the neck. The bloodwood piece will pass through the pot and hold the pot in place, as well as being an anchor for the saddle and strap. It is going to take a lot of rasping to round the heel of the potrod.
 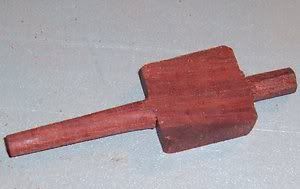 The pegs are also made of bloodwood, and they are semi-typical friction pegs. Friction pegs need to have a slight taper in order to work properly. The basic shape of the peg was hand cut with a coping saw and a small tail was left on the top. The tail of the peg was rounded with a rasp and placed in a drill press. As the peg spun in the drill, a block of wood, with a 1 degree cut on one face, was covered with sandpaper and used to create the taper of the peg. For some reason, the 1 degree cut in the block was done by my friend and it is the only part of the banjo creation that I didn't do myself.
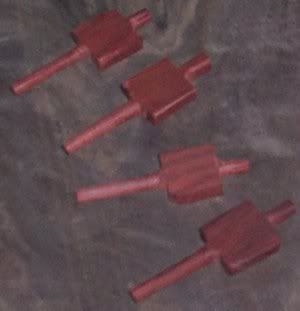 After a bit more time with the coping saw, rasp, and custom taper maker, I now had a total of 4 pegs, enough for the head. Damn that rasp! I was just too tired to create the 5th tuning peg so I relaxed in my buddy's backyard and looked for ducks.
Next up: making the 5th tuning peg, tapering the peg holes on the neck, shaping the neck and potrod, making a nut and bridge and string saddle, attaching the pot to the potrod, learning to play the banjo.
I am a fortunate person with good crafty friends.
A very good friend of mine happens to enjoy crafting wood and he agreed to let me make a banjo in his wood shop during the weekends. First thing first, select a piece of wood for the neck. To be honest, the first thing that I did was to purchase a candy tin from a local thrift store to be the pot of my banjo. Back to the neck. While searching through the scrap wood in the shop I found a piece of maple that my friend said was a poor choice because it was sap wood. Oh the poor rejected piece of wood. Just kidding, I chose the sap wood piece. It was about 35"x3"x1". There were probably a few 16ths, 32nds,8ths, or quarters that should be included in the measurement but I don't like fractions. Metric System; for the win!
 Anyway, after a lecture on shop safety and instruction on power tool usage, I was ready to start making the neck. A few passes on the joiner and the planer and the neck was squared up nicely and it was time to sand what would be the fret board ( I'm not actually using a seperate board for the fret board).
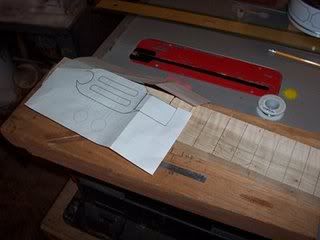 After cutting the channels for the frets, I needed to design a head stock. Thanks to inkscape, I soon had a nice printable vector graphic of my headstock.
 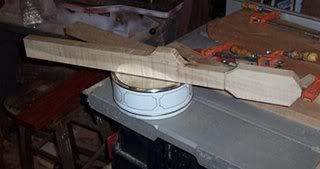 The rough cut shape with the tin that will be the banjo pot.
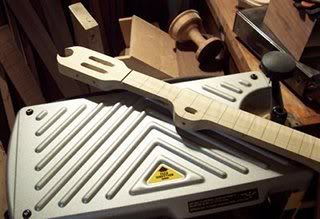 With a lot of rasp work, the neck is really starting to take shape. Someone should call Indiana Jones because I think the grail has been found.
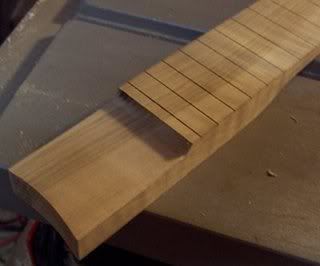 The base of the neck needed to be rounded in order to sit flush against the pot and a "strum area" was routed out.
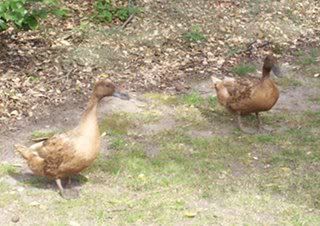 Later that day, these two ducks decided to visit my friends back yard in search of bugs.
That's it for part 1. Next weekend is tuning pegs and other assorted nick-nacks.
